Catalog
An open circuit is an incomplete electrical circuit.
It prevents current flow and device functionality.
Open circuits can be identified using multimeters.
Common causes include wiring issues and component failures.
Environmental factors can also lead to open circuits.
Diagnosing open circuits requires systematic approaches.
Multimeters are essential tools for identifying open circuits.
Documentation helps track patterns during troubleshooting.
Common issues include damaged wires and corroded connectors.
Proper tools and techniques enhance the diagnostic process.
What is an Open Circuit?
Understanding the Basics of Open Circuits
An Open Circuit refers to an electrical circuit that is incomplete, meaning there is a break in the conducting path. This can occur due to a variety of reasons, such as a faulty component or a disconnection. In practical terms, an open circuit prevents current flow, which can lead to devices being non-functional. It's essential to understand that an open circuit does not necessarily mean a short circuit or a grounded one; instead, it denotes a deliberate break in the circuit.
Open circuits can be identified through various testing methods, including the use of multimeters that measure continuity. If a multimeter indicates that there is no continuity across the circuit, it signals the presence of an open circuit. For instance, if you're troubleshooting a household appliance that won't power on, checking for open circuits is a critical first step. Understanding these basics ensures efficient diagnostics and repairs.
Common Causes and Effects of Open Circuits
There are several Common Causes of open circuits, which can range from loose connections to damaged wires. For example, exposed wires in high-wear areas can lead to unintentional disconnects. In automotive contexts, vibration can loosen connectors over time, leading to circuit interruptions. Additionally, environmental factors like moisture can cause corrosion, affecting connections and creating an open circuit. Even something seemingly minor, like a blown fuse, can effectively open a circuit and prevent devices from functioning.
The effects of an open circuit extend beyond just loss of functionality. For machinery, an open circuit can lead to unsafe operating conditions, where incomplete signals result in erratic behavior. In more advanced settings, such as in industrial control systems, the presence of an open circuit may cause entire systems to shut down, prompting more extensive repairs and system checks. Thus, identifying and addressing open circuits promptly is crucial to maintaining safety and efficiency.
Common Causes of Open Circuits

Electrical Component Failure
The most prevalent cause of open circuits in electronic systems is Failure in electrical components. These components can include resistors, capacitors, and transistors, which may deteriorate over time due to heat, stress, or manufacturing defects. When a key component fails, it interrupts the flow of electricity, subsequently leading to open circuit conditions.
Research indicates that many components can fail unpredictably, often without any clear warning signs, thus making routine checks and diagnostics essential for maintaining circuit integrity.
Wiring Issues
Another significant contributor to open circuits is faulty or damaged wiring. Exposed wires can lead to short circuits or open circuits depending on where the damage occurs. Preventive maintenance should include regular inspections of wiring for signs of wear, corrosion, or damage. Addressing these issues early can prevent more significant electrical failures down the line.
Connector Problems
Connectors are often overlooked but are crucial in ensuring a complete electrical circuit. Loose or corroded connectors can disrupt the pathway for electric current, causing open circuits. Regularly checking for tight connections and cleaning connectors can help mitigate these issues.
- Inspect connectors for corrosion or physical damage.
- Ensure that all connections are secure and tight.
- Consider using connector sealants for environments prone to moisture.
Environmental Factors
Environmental conditions such as humidity, temperature fluctuations, and exposure to chemicals can impact the integrity of circuits. For example, high humidity can promote corrosion in wiring and components, leading to failures. Similarly, extreme temperatures can cause materials to expand and contract, which may result in losing connectivity.
Manufacturing Defects
Even when products are new, manufacturing defects can lead to open circuits. Poor solder joints, substandard materials, or inadequate testing before products reach the market contribute significantly to this issue. Consumers need to be aware and conduct proper tests on new devices to ensure their reliability.
Human Error
Human intervention, particularly during installation or maintenance, can inadvertently cause open circuits. Accidental disconnections or incorrect wiring may take place, leading to unintended open circuits. Training personnel appropriately in both handling and troubleshooting electrical circuits is paramount to minimize such errors.
In addition, maintaining detailed documentation of circuit layouts and ensuring compatibility among components can help decrease the incidence of human error.
Age of Electrical Systems
As electrical systems age, they become more susceptible to failures, including open circuits. Over time, components may degrade, insulation may break down, and connections may weaken. It is vital to be proactive about upgrading older systems to avoid failures that could disrupt operations.
Using modern technology for diagnostics can help in identifying vulnerabilities in older systems. Regular assessments can be the key to extending their lifespan and maintaining reliability.
Tools and Techniques for Diagnosing Open Circuits
Common Tools for Detecting Open Circuits
When it comes to Diagnosing Open Circuits, a multimeter is one of the essential tools you'll need. This device measures voltage, current, and resistance, allowing you to identify breaks in the circuit effectively. By setting the multimeter to continuity mode, you can quickly check if there is a complete path for electrical current. If there is an open circuit, the multimeter will alert you with a beep or a 'no continuity' reading. This straightforward method is foundational in troubleshooting electrical problems, whether in automotive wiring or household electronics.
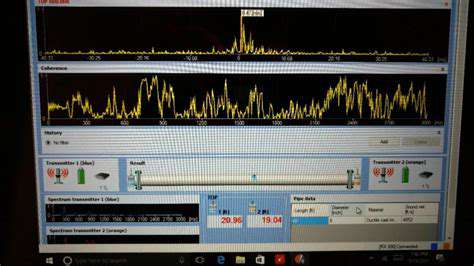
Another critical tool is an oscilliscope, which provides a visual representation of the voltage signals within a circuit. While not as commonly used as a multimeter, an oscilloscope can be invaluable for diagnosing intermittent faults. It allows technicians to observe the waveform of the signal, making it easier to pinpoint where an interference might be occurring. Understanding how to read waveforms can provide insights that are not immediately obvious through basic continuity testing, thus expanding the troubleshooting process significantly.
Techniques for Effectively Diagnosing Circuit Failures
Utilizing a systematic approach when diagnosing open circuits is key. One effective technique is the Divide-and-Conquer Method. This entails isolating sections of the circuit until you find the fault. For instance, disconnect the circuit and check all connections methodically. Employing this strategy not only speeds up the process but also minimizes the risk of overlooking potential issues. This method has been proven to reduce troubleshooting time significantly in both complex industrial systems and simpler domestic setups.
Moreover, documenting your findings as you go can be extremely helpful. Keeping a detailed record of your tests, readings, and changes made during the troubleshooting process allows you to track patterns and might reveal underlying issues that may not be immediately evident. This practice is often overlooked, yet it can provide insights that lead to more effective long-term maintenance solutions. Over time, this documentation can serve as a base of knowledge for future repairs, benefiting the entire repair team.
Steps to Diagnose an Open Circuit
Understanding Open Circuits
An Open circuit refers to a break or discontinuity in an electrical pathway, preventing current from flowing. This can occur due to various reasons, such as damaged wiring, faulty connections, or burned-out components. In both residential and commercial settings, open circuits can lead to significant system failures. Understanding the basics of how open circuits work is essential for anyone involved in electrical troubleshooting.
In addition to causing operational failures, open circuits can pose safety risks. For instance, when electrical appliances fail to operate, it may be tempting to attempt DIY repairs without adequate knowledge. This can lead to further complications or even accidents. Therefore, ensuring a thorough understanding of the implications of an open circuit is crucial for both safety and regulatory compliance.
Equip Yourself with the Right Tools
To successfully diagnose an open circuit, having the Right tools is imperative. Commonly used tools include a multimeter, which can measure voltage, current, and resistance, helping locate faults with precision. A continuity tester can also be beneficial for identifying breaks in the circuit effortlessly. Moreover, investing in quality tools ensures more accurate readings and greater reliability during troubleshooting tasks.
It’s also handy to have wire strippers, clamps, and screwdrivers on hand for inspecting and repairing any damaged connections. The ability to stabilize loose wires or replace faulty connectors can drastically reduce diagnosis time. Ultimately, a well-equipped toolbox enhances your efficiency and capability when dealing with electrical systems.
Step-by-Step Diagnostic Process
The diagnostic process for open circuits typically involves a methodical approach. Begin by visually inspecting the components of the circuit for any obvious signs of damage. Look for burnt connections, broken wires, or corroded terminals. Next, use your multimeter to check for voltage at various points along the circuit; this can help you narrow down potential problem areas.
Once you've identified sections without voltage, perform a continuity test to confirm whether there's a break in the circuit. If continuity exists between segments but voltage is lacking, it might indicate issues further upstream, possibly involving power sources or circuit breakers. By systematically isolating sections of the circuit, you can effectively pinpoint where the fault lies.
Common Issues and Solutions
Several common issues can lead to open circuits, each requiring specific solutions. For instance, frayed or damaged wires may simply need to be spliced or replaced, while corroded connectors might require cleaning or full replacement to ensure a good electrical connection. Sometimes, the open circuit may stem from a blown fuse or tripped breaker, which can often be resolved by merely resetting or replacing the faulty component.
Furthermore, temperature can also affect circuit integrity. Excessive heat can damage insulation or weaken connectors, leading to intermittent open circuits. In such cases, it’s advisable to improve ventilation or use components rated for higher temperatures. By understanding these common issues, you can apply practical solutions promptly and efficiently to restore circuit functionality.
Read more about