Starter Motor
Vehicle Maintenance
HTML
Styling
Car Repair
Automotive Maintenance
Thay thế động cơ khởi động của xe hơi
Dấu hiệu cảnh báo cần chú ý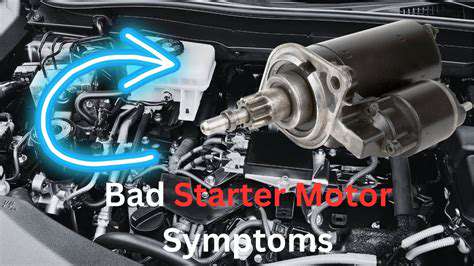
Các triệu chứng động cơ khởi động thường gặp
Động cơ khởi động bị hỏng có thể biểu hiện theo nhiều cách, thường gây khó chịu và
Chuẩn Bị Không Gian Làm Việc và Phương Tiện
Chuẩn Bị Không Gian Làm Việc
Trước khi bắt đầu quá trình thay thế động cơ khởi động của xe, điều rất quan trọng là phải chuẩn bị một không gian làm việc an toàn và ngăn nắp. Một khu vực đủ sáng và có không gian rộng rãi để di chuyển là điều cần thiết để tránh nguy hiểm.
Read more about Thay thế động cơ khởi động của xe hơi

//yourwebsite.com/static/images/10/2024-11/CommonCausesofUnevenTireWear.jpg
Nov 19, 2024
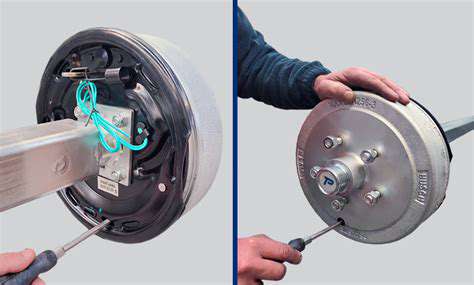
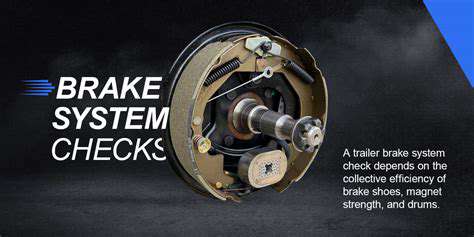
Sự khác biệt giữa bảo dưỡng phanh tang trống và phanh đĩa
May 02, 2025
Khuyến cáo của chuyên gia về việc duy trì mức chất lỏng phanh ổn định
May 07, 2025

Đánh giá độ bền của hệ thống phanh hiện đại cao hiệu suất
May 11, 2025


Các phương pháp tốt nhất để ngăn ngừa mất điện trên xe cũ
May 16, 2025
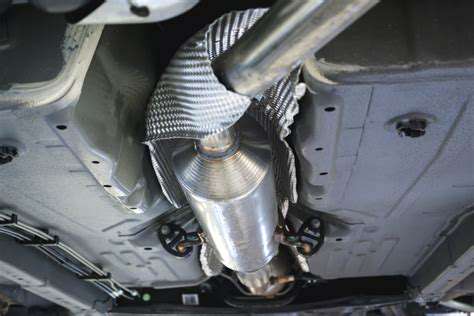
Thay thế bộ giảm thanh: Tiếng ồn và hiệu suất
Jun 08, 2025


Thay dầu hộp số: Giúp kéo dài tuổi thọ hộp số
Jun 10, 2025

Thay thế tụ điện điều hòa không khí: Sửa chữa hệ thống làm lạnh
Jul 01, 2025

Giá đỡ Kayak và Cano: Vận chuyển thể thao dưới nước
Jul 09, 2025

Cảm biến Oxy Có Dải Rộng: Tỷ Lệ Khí-Nhiên Liệu Chính Xác
Jul 22, 2025