HTML
Styling
Cooling Systems
Pressure Testing
System Inspection
Troubleshooting
Cooling System Maintenance
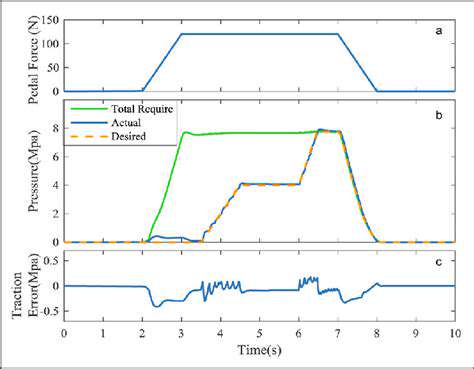
냉각 시스템 압력 테스터: 누출 감지
문제 해결 및 유지 관리 팁
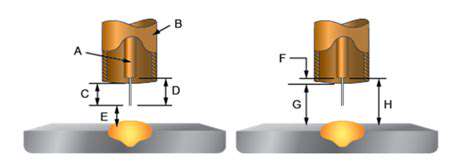
공기 누출 확인
공기 유입은 종종 냉각 시스템의 압력 손실을 유발합니다. 연결 부위 근처에서 냉각수 거품이나 들리는 누출 소리를 확인하십시오. 모든 호스의 시각적 검사로 문제 해결을 시작하세요.