Lắp Ghế Ô Tô Phụ Kiện
Thoroughly inspecting your vehicle before any installation is crucial for a smooth and successful process. This pre-installation checklist ensures that you have all the necessary components and that your vehicle is in optimal condition for the upcoming work. A well-prepared vehicle minimizes potential issues and ensures a quicker installation. Identifying any pre-existing issues before the installation process starts can save you time and money.
Careful planning and preparation are key steps to avoid future complications. This involves verifying the compatibility of the components with your vehicle's specifications, ensuring proper access to the designated installation areas, and confirming that all required tools and materials are readily available. This proactive approach will reduce stress and potential errors during the installation phase.
Gathering Essential Components
Before initiating the installation, confirm that you have all necessary components, including hardware, software, and any additional accessories. This meticulous check prevents delays and ensures a complete installation. Double-check the parts list provided with the installation kit to avoid missing any critical components.
Accessing Installation Areas
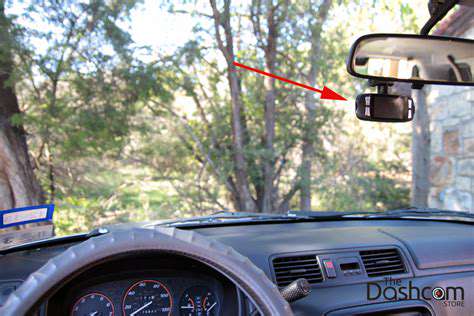
Ensuring adequate access to the designated installation areas is vital for a safe and efficient process. Clearing any obstructions or impediments in the target areas is essential for both the installer and the work itself. This step promotes a safe working environment and prevents potential damage to your vehicle.
Properly accessing the installation location is crucial for a quality installation. This includes removing any unnecessary components or coverings in the way to gain clear access to the target area. This thorough preparation will help ensure a smooth and efficient installation process.
Checking Vehicle Specifications
Verify that the components you're installing are compatible with your vehicle's specific make, model, and year. Mismatched components can lead to significant complications and potential damage. Consulting your vehicle's owner's manual is crucial to ensure compatibility. Understanding the technical specifications of your vehicle will help avoid any compatibility issues.
Thoroughly reviewing the vehicle's specifications is essential to guarantee a successful installation. This includes confirming that the components are compatible with your vehicle's electrical system, ensuring proper fitment, and verifying that the installation won't interfere with other vehicle systems. In addition, checking for any previous modifications to the vehicle is critical.
Preparing the Installation Area
Ensure the designated installation area is clean, dry, and free from any potential hazards. A clean and organized space is crucial for efficient work and prevents damage or accidents during the installation process. A clear and organized workspace promotes accuracy and minimizes installation errors.
Preparing the installation area includes protecting the vehicle's interior from potential damage. Covering sensitive components and ensuring that the installation area is well-lit and ventilated will contribute to a safer and more efficient work environment. This proactive measure is essential for both the technician and the integrity of the vehicle.
Safety Precautions and Procedures
Adhering to safety precautions and procedures is paramount during the installation process. Always follow the manufacturer's instructions carefully, and ensure all electrical connections are properly secured to prevent short circuits or other electrical hazards. Prioritizing safety protects both the vehicle and the installer.
Implementing safety procedures is critical to a successful installation. This includes wearing appropriate safety gear, such as gloves and eye protection, to safeguard against injury. Always disconnect the vehicle's battery before working on any electrical components to avoid electrical shocks.
Essential Installation Steps and Techniques
Preparing the Vehicle
Before installing any aftermarket car seat, thoroughly inspect the vehicle's interior and ensure all existing child safety features are intact. This includes checking the seatbelt retractor mechanism, seatbelt buckles, and any pre-installed anchors or mounting points. Properly assessing the vehicle's condition is crucial for a safe and secure installation. If any components appear damaged or worn, consult a professional mechanic or the car seat manufacturer's instructions for guidance.
Carefully measure the vehicle's dimensions, seatbelt width, and the available space in the back seat. Understanding the vehicle's specific configuration will help in selecting the appropriate car seat model and ensure a proper fit. This crucial preparation step minimizes installation errors and maximizes the car seat's effectiveness. Documentation of the vehicle's specifications is essential for accurate installation.
Choosing the Right Car Seat
Selecting the correct aftermarket car seat model is paramount. Consider the child's age, weight, and height, and choose a car seat that meets these criteria. Refer to the manufacturer's guidelines and the child's growth charts to ensure the car seat provides the appropriate level of protection and support. Thorough research and careful consideration of these factors are essential for a safe installation.
Review the car seat's compatibility with your vehicle's specific features. Some car seats are designed for particular vehicle types or seatbelt systems. Incorrect pairing can significantly impact the seat's effectiveness and safety. Be meticulous in verifying compatibility before proceeding with the installation process.
Securing the Car Seat Base (if applicable)
If the car seat utilizes a base, carefully follow the manufacturer's instructions for installation. Ensure the base is firmly secured to the vehicle's seat using all provided mounting hardware. Properly fastening the base is vital for a stable and secure installation, reducing the risk of movement during a collision. This step is critical for the car seat's safety performance.
Double-check all connections and ensure the base is level and aligned with the vehicle's seat. Any misalignment or loose connections can compromise the base's stability. A precisely installed base is essential for the car seat to function correctly.
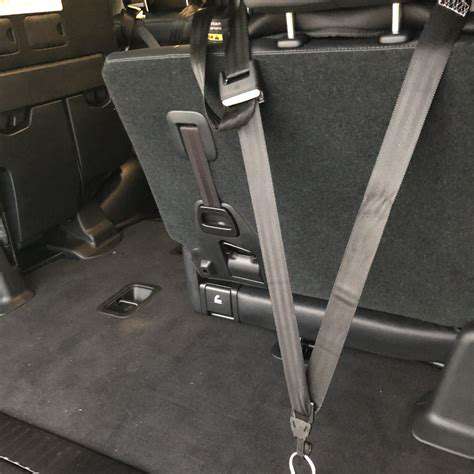
Connecting the Seatbelt (for seatbelt-based installations)
If the car seat is designed for seatbelt installation, carefully thread the seatbelt through the car seat's designated slots. Ensure the seatbelt is properly routed and aligned with the car seat's latch system. A precise seatbelt connection is crucial for a secure installation and to meet safety standards.
Make sure the seatbelt is fastened snugly and that there are no slacks or kinks. Proper tension is critical for maintaining the car seat's stability and preventing movement during a crash. Tightening the seatbelt is essential for effective restraint.
Adjusting the Car Seat for the Child
Once the car seat is securely installed, adjust the headrest and harness to the appropriate height and position for the child. Consult the manufacturer's instructions for specific guidelines and ensure the harness is snug and properly fitted. Correctly positioning the child in the car seat is essential for their comfort and safety.
Ensure the child's body is properly supported by the car seat's structure. Appropriate positioning minimizes the risk of injury in the event of an accident. Proper adjustment of the car seat is critical for optimum safety.
Checking the Installation
After completing the installation, thoroughly check the car seat's stability and security. Ensure the car seat does not move or shift when gently pulled. This crucial step helps to verify the proper installation of the car seat. Checking the installation prevents potential issues and ensures the car seat is properly secured.
Review the manufacturer's instructions and ensure all steps have been followed accurately. Carefully inspect the connections to ensure everything is properly secured. Verify the seatbelt is properly routed and fastened to the car seat. This meticulous final check will help ensure a safe and effective car seat installation.
Maintenance and Inspection
Regularly inspect the car seat for any damage or wear. Replace the car seat if any damage is observed or if it no longer meets the manufacturer's safety standards. This will help ensure the car seat continues to provide adequate protection. Safety inspections are crucial to maintaining the car seat's effectiveness and preventing potential hazards.
Follow the manufacturer's recommendations for cleaning and maintenance. Proper care will help to maintain the car seat's functionality and safety. This will help maintain the car seat's integrity and ensure proper operation for future use.
When selecting a spot for your gazebo, careful consideration of several factors is crucial for maximizing its enjoyment. Sunlight exposure, privacy, and proximity to existing structures like patios or decks are all key elements to weigh before making a final decision. Assessing the surrounding landscape, including trees and potential obstructions, is also vital for a seamless integration into your outdoor space.
Maintaining and Inspecting Your Aftermarket Car Seat
Maintaining Your AF: A Comprehensive Guide
Maintaining your Air Fryer (AF) is crucial for its longevity and optimal performance. Regular cleaning prevents the build-up of food residue, grease, and odors, which can lead to unpleasant smells and potentially affect the taste of your future meals. Proper cleaning ensures that the AF functions efficiently and delivers consistently delicious results. This includes removing food particles from the basket, drip tray, and any other removable parts. A clean AF also helps to maintain a hygienic cooking environment.
Beyond the immediate cleaning, routine maintenance involves checking for any loose or damaged components. Inspecting the heating elements, the basket, and the exterior casing for signs of wear and tear is essential for safety and performance. If you notice any damage or malfunction, it's best to avoid using the AF and contact the manufacturer or a qualified technician for repair or replacement.
Inspecting Your AF for Efficiency
Regular inspection of the AF's components helps ensure optimal performance and prevents potential hazards. This includes checking the heating element for any signs of burning or discoloration, which could indicate a problem with the electrical components. Inspecting the basket and drip tray for any warping or damage is also critical, as this can affect the even distribution of heat and the overall cooking process. Look for any unusual sounds or vibrations, which may point to a malfunctioning part within the AF. Inspecting the exterior of the unit is equally important for spotting any signs of damage or wear, which could affect the appliance's structural integrity.
Careful monitoring of the AF's functionality is key to identifying potential issues early on. Note any changes in the cooking time or temperature readings, as these could signal a problem with the heating system. Pay close attention to any unusual odors or smoke coming from the AF, which could indicate a malfunctioning electrical component. A thorough inspection can help maintain the AF's overall efficiency and effectiveness for years to come. Be aware of any potential safety hazards.
Deep Cleaning Your Air Fryer
Deep cleaning your Air Fryer (AF) should be done periodically, usually every few months. This thorough cleaning involves disassembling the AF and cleaning every part, including the heating element, basket, and drip tray. Use a mild dish soap and warm water to clean all the removable parts. Thoroughly rinsing and drying each part is vital to prevent the build-up of residue and maintain the AF's optimal performance. The AF should be completely dry before reassembling. Following the manufacturer's instructions for reassembly is critical to ensuring proper function and safety.
Cleaning the interior of the AF is important in removing any food particles or grease that may have accumulated inside. Use a soft brush or sponge to scrub away any stubborn residue. This will help keep the AF in good condition, preventing potential health hazards and ensuring that your meals are prepared in a clean and hygienic environment. Deep cleaning helps maintain the air fryer's optimal performance.
Read more about Lắp Ghế Ô Tô Phụ Kiện