HTML
Styling
CSS
Vehicle Repair
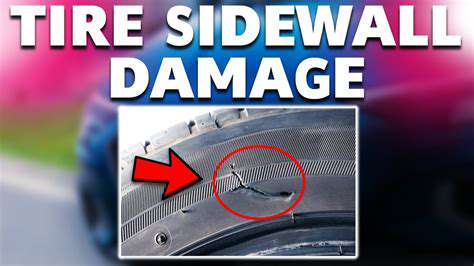
Damage Assessment
Repair Strategy
Surface Preparation
Refinishing
범퍼 수리: 경미한 충돌 수리
어린이 방을 최대의 안전과 창의적인 놀이를 위한 조직 방법 //bookloverss.top/How-to-Organize-a-Children's-Room-for-Maximum-Safety-and-Creative-Play>아이들을 위한 안전한 보금자리를 만드는 것은 아이들의 안전과 행복을 보장하는 데 매우 중요합니다. 이는 예방적인 조치를 통해 이루어집니다.
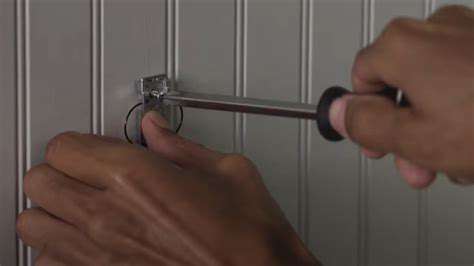
분리되거나 손상된 클립 및 고정 장치 수리
손상 확인
손상 정도를 평가하는 것은 효과적인 수리를 위해 필수적입니다. 분리되거나 손상된 클립과 고정 장치를 자세히 살펴보고 특정 유형을 기록하십시오.
마무리 작업: 광택 및 재도장
재도장을 위한 표면 준비
어떤 재도장 과정을 시작하기 전에, 손상된 부위에 대한 철저한 준비가 필수적입니다. 이는 영향받은 부분을 꼼꼼하게 청소하는 것을 포함합니다.
Read more about 범퍼 수리: 경미한 충돌 수리
차량이 정지하는 데 더 오래 걸리거나 반응이 느려진다면 브레이크 시스템 업그레이드가 필요할 수 있습니다.
- 차량 적재량 또는 성능 향상: 더 무거운 짐을 견인하거나 더 강력한 엔진으로 업그레이드하는 등의 변경 사항은 브레이크 시스템에 영향을 미칩니다.
May 02, 2025