Bumper Repair: Fixing Minor Collisions
Repairing Detached or Damaged Clips and Fasteners
Identifying the Damage
Assessing the extent of the damage is crucial for effective repair. Look closely at the detached or damaged clips and fasteners, noting the specific type and location of the damage. Are the clips bent, broken, or missing entirely? Identifying the precise nature of the damage will help determine the appropriate repair method and the necessary replacement parts.
Consider the surrounding area as well. Are there any signs of underlying damage to the bumper or the car's paint? This could indicate a more extensive problem that needs attention and should be noted before proceeding with the clip repair.
Gathering Necessary Supplies
Before starting the repair, gather all the necessary tools and supplies. This will save time and frustration during the process. You'll need appropriate screwdrivers, pliers, and potentially a small hammer for gentle tapping. Ensure you have a good quality replacement clip or fastener, matching the original part exactly in type and size. High-quality plastic clips are essential for a lasting and visually appealing repair.
A set of quality, small-sized pliers is a must-have. Using incorrect tools can damage the clips further or the surrounding bumper material.
Preparing the Area
Clean the area around the detached clip or fastener thoroughly. Dirt, debris, and loose paint can interfere with the repair process. Use a clean cloth and a mild degreasing agent to remove any contaminants. This will ensure proper adhesion and a clean repair.
Make sure the surrounding paint is in good condition. Any chipped or damaged paint needs addressing before the fastener repair to prevent further damage or paint inconsistencies.
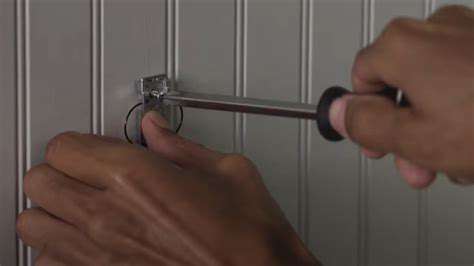
Removing the Damaged Clip
Carefully remove the damaged clip or fastener. Use the appropriate tools, such as pliers, to gently grasp and remove the clip. If it's stuck, try using a small amount of gentle pressure, perhaps tapping it from the side with a small hammer. Be very careful not to damage the surrounding bumper plastic or paint during the removal process. Avoid using excessive force, which could result in further damage.
Installing the New Clip
Position the new clip carefully into the corresponding hole or slot in the bumper. Ensure it aligns properly and is seated correctly. Gently push the clip into place using the appropriate tools. Pay attention to the clip's positioning to ensure it will function properly and provide a secure connection.
Securing the Clip
Once the clip is in place, use the appropriate tool to secure it. Ensure the clip is firmly seated and won't come loose easily. If necessary, use a small amount of adhesive to reinforce the clip's position if it is a particularly vulnerable area. Properly securing the new clip is critical for the long-term integrity of the repair.
Finishing Touches and Inspection
After the new clip is installed, visually inspect the repair to ensure it's secure and properly aligned. Check for any gaps or misalignments. If necessary, make minor adjustments to the clip. A final clean-up of the surrounding area will ensure a professional finish. Inspect the completed repair from different angles to verify the overall quality of the repair before driving.
Finishing Touches: Polishing and Refinishing
Preparing the Surface for Refinishing
Before embarking on any refinishing process, a thorough preparation of the damaged area is crucial. This involves meticulously cleaning the affected area to remove any loose debris, dirt, or contaminants. Proper surface preparation ensures that the refinishing material adheres correctly and provides a long-lasting, aesthetically pleasing result. This step also helps to identify any underlying issues that might need addressing, such as rust or deep scratches that require additional attention.
Using appropriate cleaning solutions and tools, such as specialized automotive degreasers and abrasive pads, is essential for achieving a clean, smooth surface. This process is not just about removing visible dirt; it's about creating a surface that is receptive to the new paint or refinishing material. Proper preparation ensures that the repair is not just visually appealing, but also structurally sound and durable.
Selecting the Right Refinishing Materials
Choosing the correct refinishing materials is paramount to a successful repair. Consider the type of paint originally used on the bumper. Matching the new paint to the existing color and finish is critical for a seamless blend. Using a color-matching tool, such as a paint scanner or a color chart, ensures a precise match to the original hue. This attention to detail is vital for achieving a high-quality repair that is virtually indistinguishable from the original bumper.
Different types of refinishing materials exist, ranging from touch-up paints to complete resprays. Understanding the characteristics of each material—such as coverage, drying time, and durability—will help determine the best solution for the specific repair. Thorough research and careful consideration will help ensure that the chosen material is well-suited to the particular damage and the overall aesthetic of the vehicle.
Applying the Refinishing Material
Applying the chosen refinishing material requires precision and attention to detail. Follow the manufacturer's instructions carefully for optimal results. This includes proper mixing, application techniques, and drying times. Applying thin, even coats minimizes imperfections and promotes a smooth, uniform finish.
Careful attention to the flow and blending of the material is crucial to avoid noticeable lines or streaks. Using specialized tools, such as airbrushes or spray guns, can create a professional finish. Proper ventilation and safety precautions are essential during this stage to avoid health risks.
Finishing and Polishing
Once the refinishing material has cured, the final stage involves polishing and buffing to achieve a showroom-worthy shine. This step removes any imperfections or lingering texture from the application process. Using appropriate polishing compounds and techniques, carefully remove any blemishes or unevenness. Professional-grade polishing compounds and tools are often recommended for optimal results.
Polishing and buffing procedures should be performed with care to prevent scratching or marring the newly refinished surface. Regular checks throughout the process are vital to ensure a flawless finish. This final step completes the repair, giving the bumper a polished and professional appearance.
Inspecting and Finalizing the Repair
A thorough inspection of the repaired bumper is essential to ensure the quality of the work. Examine the area for any imperfections, unevenness, or inconsistencies. Pay close attention to the color match, smoothness, and overall finish. Comparing the repaired area to the surrounding undamaged sections helps identify any discrepancies that need further attention.
Once satisfied with the inspection, the final steps involve cleaning the area and ensuring a spotless finish. This might include removing any residue from the polishing process and applying a protective sealant to enhance durability. This final step guarantees a long-lasting repair and provides added protection to the refinished bumper.
Read more about Bumper Repair: Fixing Minor Collisions