Understanding relay specifications is crucial for proper testing and replacement. Most relays come with a voltage rating, indicating the maximum voltage they can manage without failure. Knowing this helps to prevent the installation of an incompatible relay which could lead to further electrical issues.
Also, the current rating is essential; exceeding this value can lead to overheating and damage. Equipment must match these specifications to ensure longevity and functionality. By consulting product datasheets and manuals, you can ensure that the relay meets or exceeds the operational requirements of your vehicle.
Best Practices in Relay Testing
When testing automotive relays, it’s essential to follow systematic procedures for accuracy and safety. Start with disconnecting the battery to avoid any short circuits. Next, use a multimeter to check both the relay's resistance and continuity. This will help identify if the relay is functioning properly or if it malfunctions under load.
Another critical step involves checking for voltage supply at the relay terminals while the circuit is active. If the terminals show no voltage, it indicates that the issue might be upstream. Always refer to your vehicle's service manual for the specific relay pin-out to avoid confusion.
Lastly, remember to document your testing results. This practice can be invaluable for tracking recurring issues and facilitates better communication with technicians in case further inspection is needed.
Step-by-Step Procedure for Testing a Relay

Gathering Necessary Tools and Materials
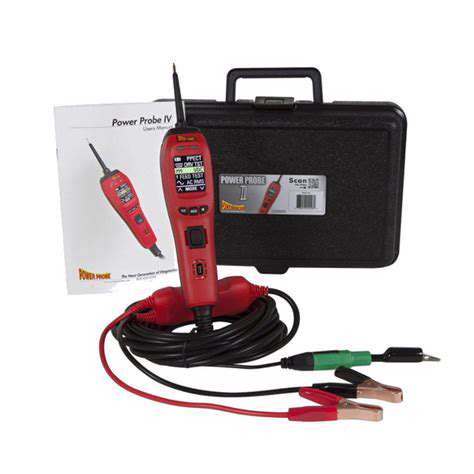
The first step in testing a relay involves gathering all necessary tools and materials to ensure an accurate and efficient analysis. You will need a digital multimeter, a jumper wire, and a relay tester if available. Having these components ready allows for a seamless testing process without unnecessary interruptions.
Additionally, a detailed service manual for your specific vehicle model can be incredibly helpful. It will provide schematic diagrams and other critical information related to the relay's pin configuration and functionality. Once these items are gathered, you can proceed with confidence, knowing you have everything necessary for a successful test.
Safety Precautions Before Testing
Before diving into the testing procedure, it's vital to observe crucial safety measures. Make sure the vehicle is parked in a safe location and that the ignition is off. Disconnect the battery to prevent any accidental short circuits or electrical shocks during the relay testing phase. Prioritizing safety will ensure a risk-free environment as you work.
Step-by-Step Testing Procedure
- Ensure you have the correct relay specifications.
- Connect the multimeter to the relay terminals.
- Test for continuity and resistance.
- Use jumper wires to simulate relay activation.
The testing procedure itself should be performed methodically. Start by identifying the terminals on the relay and connecting your multimeter as indicated in your manual. Initially, check for continuity across the relay when it is activated; a reading of zero or very low resistance is expected. If you observe an infinite resistance, it indicates the relay is faulty.
If the relay passes this initial test, use the jumper wire to bypass the coil and activate the relay manually. Listening for a click sound or observing the opening and closing of contacts can affirm the relay’s functionality. This step confirms not only the electrical integrity but also the mechanical operation of the relay.
Interpreting Test Results
Once you've completed the tests, it’s important to interpret the results accurately for informed decision-making. A continuity test showing resistance in the expected range indicates the relay is operational; however, sellers’ specifications can vary significantly. Therefore, it’s advisable to cross-reference these readings with your vehicle's service manual.
If the relay shows irregularities, consider a replacement. Keep in mind that even if the relay appears to operate, internal contacts may still be compromised; performing additional tests, such as those measuring resistance under load, can provide more comprehensive insight. Trusting your measurements over assumptions will ensure reliability in your repairs.
Common Issues with Automotive Relays
Understanding Relay Failure Modes
Automotive relays can fail for a variety of reasons, and understanding these failure modes is key to troubleshooting effectively. Common modes include contact welding and coil burnout. When contacts weld together, it can prevent the relay from opening, which can lead to circuits being permanently energized. This issue is often caused by overcurrent conditions exceeding the relay's rated capacity. The high temperatures can also affect other components in the circuit, leading to further automotive malfunctions.
Coil burnout is another frequent issue that occurs when the relay's coil draws excessive current due to a short or fault in the system. This scenario can lead to a complete loss of the relay's functionality. Regular inspection and testing can help identify these problems early, potentially saving time and costs associated with larger repairs. Furthermore, using properly rated relays for specific applications can mitigate these risks significantly.
Signs of Relay Malfunction
Identifying the early Signs of Relay Malfunction can prevent major automotive failures down the line. Common symptoms include intermittent operation or total inoperability of components the relay controls. For example, if headlights flicker or do not turn on at all, the relay responsible may be failing. In vehicles equipped with multiple relays, one can often isolate the problematic relay by swapping it with another of the same type that is known to be functioning correctly, thus leading to a quick diagnosis.
Another key indicator of relay issues is an audible clicking sound when the relay is supposed to engage. This sound can indicate that the relay is energized but failing to make a proper connection. It's crucial for automotive technicians to carry appropriate diagnostic tools, as the ability to measure voltage across terminals can provide concrete evidence of a relay issue. Incorporating good practices, like visual inspections for corrosion on terminals and ensuring tight connections, helps maintain relay functionality over time.
Read more about