Scratch Remover: Minor Paint Imperfections
Paint scratches can range from minor imperfections to significant damage, each requiring a different approach to repair. A light scratch may simply need a touch-up using a matching paint color to blend in the imperfection. These repairs can be done with minimal tools and time, allowing you to address the damage quickly and efficiently. Often, these minor scratches are subtle and can be corrected with a touch-up pen or a matching paint for an almost invisible repair.
More substantial scratches that penetrate the paint's surface require more comprehensive repairs, including the use of sanding and compounding tools. In these cases, a professional touch might be necessary to ensure the scratch is fully removed and the paint's finish is restored to its original condition. These deeper scratches can sometimes require a complete repaint of the affected area for optimal results, depending on the severity of the damage. Knowing the extent of the scratch is vital for selecting the right repair method.
Severe scratches, often caused by considerable force, may require significant restoration. These deep gouges, or even dents, might affect the structural integrity of the paint, and may not be repairable with simple touch-ups or minor repairs. In these situations, professional automotive repair services are typically recommended to ensure the safety and aesthetic integrity of the vehicle. Evaluating the extent of the damage is key to determining if it's a DIY project or a job for a professional.
Recognizing the varying degrees of paint scratches is vital for effective and efficient repair. This knowledge helps determine the proper technique and materials needed to restore the paint to its original condition, whether it's a quick touch-up or a more involved repair process.
Proper identification is crucial for choosing the correct repair method, whether a touch-up pen or a full repaint. Understanding the types of scratches allows you to address the issue effectively and prevent further damage to the vehicle's paint job.
Ignoring a deep scratch can lead to rust formation, undermining the overall integrity of the vehicle's paint, while a minor scratch can be easily remedied. This understanding empowers you to handle paint damage appropriately and maintain the vehicle's condition.
Preparing the Surface for Effective Scratch Removal
Surface Preparation: A Critical First Step
Proper surface preparation is the foundation of any successful project, whether it's painting a room, installing flooring, or applying a sealant. Ignoring this crucial step can lead to premature failure and costly repairs down the line. Thorough surface preparation ensures a strong, durable, and aesthetically pleasing finish. It involves removing any loose or damaged materials, ensuring a clean and consistent surface for the subsequent application.
This initial stage often involves more than just a quick clean. It's about meticulous attention to detail, ensuring that the underlying surface is ready to receive the new material. This proactive approach can save you time, money, and frustration.
Cleaning and Dust Removal
Thorough cleaning is essential to remove any dirt, dust, grease, or debris that may compromise the adhesion of the new material. A general sweep or vacuum is often insufficient. Specialized cleaning solutions and tools may be required depending on the surface material and the nature of the contaminants. This step is critical because any foreign particles can prevent the new material from bonding properly.
Ensure that the surface is completely dry before proceeding to the next step. Moisture can significantly impact the adhesion of the material. Using appropriate cleaning tools and products is crucial to avoid damaging the surface.
Inspecting for Damage and Defects
A careful inspection of the surface is vital to identify any existing damage or defects. This includes checking for cracks, holes, loose or flaking paint, or other imperfections. Identifying these issues early on helps prevent them from becoming bigger problems later.
Addressing these problems now will save you significant time and money in the long run. Documenting any issues and taking photos is a good practice. This documentation helps in planning the necessary repairs or preparations.
Repairing Damage and Defects
Once any damage or defects are identified, they need to be repaired effectively. This may involve patching holes, filling cracks, or sanding uneven surfaces. Using the correct materials and techniques for the specific type of damage is crucial. Improper repairs can compromise the structural integrity and aesthetics of the surface.
Carefully follow the manufacturer's instructions for the repair materials to ensure optimal results. This step is often overlooked, but proper repair ensures the long-term success of the project.
Preparing Surfaces for Painting
Preparing surfaces for painting is a crucial step for achieving a smooth and durable finish. This involves cleaning the surface thoroughly, repairing any existing damage, and ensuring the surface is properly primed. Proper preparation leads to a flawless paint job that lasts for years to come.
Preparing Surfaces for Flooring Installation
Preparing a surface for flooring installation necessitates a meticulous approach. This involves removing existing flooring, ensuring a level surface, and addressing any subfloor issues. A consistent, stable subfloor is crucial for the longevity and stability of the new flooring. This involves using appropriate levelling compounds and preparing the subfloor for the new flooring.
Preparing Surfaces for Sealant Application
Preparing a surface for sealant application requires careful attention to detail. This involves thoroughly cleaning the surface, removing any loose or damaged materials, and ensuring the surface is completely dry. A clean and dry surface is essential for effective sealant adhesion and durability. This stage is crucial for the integrity and longevity of the sealant application.
Before embarking on a walk across uneven surfaces, a crucial first step is to thoroughly assess the terrain. Look closely at the ground for potential hazards such as loose stones, uneven pavement, or patches of ice. Consider the elevation changes and how they might impact your balance and walking style. This careful pre-walk assessment is paramount to anticipating and mitigating any potential falls or injuries.
Applying the Scratch Remover: A Step-by-Step Guide
Preparing the Surface
Before applying the scratch remover, thoroughly clean the affected area of the vehicle's paint. This step is crucial to ensure the scratch remover adheres properly and works effectively. Use a microfiber cloth and a mild, car-safe cleaner to remove any dirt, dust, or debris. Failing to properly clean the surface could lead to uneven application of the product and potentially worse results.
Inspect the scratch meticulously. Determine the depth and extent of the damage. A shallow scratch might only need a touch-up, while a deeper scratch may require multiple applications or a more intensive repair method. Understanding the severity of the scratch will guide your application strategy and help you avoid unnecessary product use.
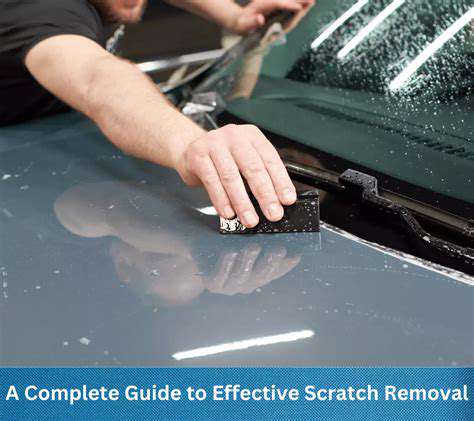
Applying the Scratch Remover
Carefully follow the manufacturer's instructions for applying the scratch remover. This often involves gently rubbing the product into the scratch in small, circular motions. Over-application can lead to streaks or unwanted effects. Ensure you're using the product correctly to avoid creating additional problems.
Apply a small amount of the scratch remover to a microfiber applicator pad. Avoid using excessive pressure, as this can damage the paint further. Gently work the product into the scratch, taking care to avoid spreading the damage. Allow the scratch remover to sit for the recommended time before buffing.
Employ a gentle rubbing action, focusing on the affected area. A light touch is key to prevent causing more harm than good. Over-aggressive rubbing can lead to a hazy or uneven finish, making the scratch more noticeable. If you encounter any resistance or difficulty, discontinue application and contact a professional.
Buffing and Finishing
Once the recommended dwell time is complete, carefully buff the area with a clean microfiber cloth. This step removes any excess product and helps to smooth out the affected area. A proper buffing technique is essential in achieving a flawless finish. Always work in small, circular motions, and be patient.
Inspect the area closely after buffing to ensure the scratch has been effectively removed. If the scratch remains, repeat the application process, but be more cautious and avoid excessive pressure. If the scratch is still visible after multiple attempts, consider consulting a professional detailer or auto body repair shop.
Finally, thoroughly clean the area with a clean microfiber cloth and a car-safe cleaner to remove any remaining product residue. A final inspection will help ensure the repair is complete and satisfactory. This final step ensures a clean and polished look, ready for display.
Read more about Scratch Remover: Minor Paint Imperfections